This is the second of a four part series of "Back to Basics" posts covering a few easy ways of propagating new plants for your garden. The first of the series was a basic guide to sowing seeds. This time round I'll show you how to take basic cuttings. In parts 3 and 4 I'll show you how easy it is to plant bulbs and pot up runners.
How to plant bulbs - A Beginner's Guide
How to grow new plants from runners - A Beginner's Guide
How to plant bulbs - A Beginner's Guide
How to grow new plants from runners - A Beginner's Guide
Isn't taking cuttings fiddly and difficult to do?
No! There are lots of ways of taking cuttings from a wide range of plants. Some are more difficult than others. To get the best results, there are lots of additional things you can do to give your plants the perfect start and the best chance of growing successfully. But the basic process is simple. I've stripped it down to the basics so that anyone can have a go.
Pin for later:
Why take cuttings?
Growing from cuttings is a low cost way of cloning your favourite plant. Maybe you just want more of it, or if there's a plant that might not survive a bad winter outside, you can take cuttings which are small enough to look after inside as an insurance policy.
If the parent plant doesn't make it you can replace it in spring by planting out the smaller ones grown from cuttings.
If the parent plant doesn't make it you can replace it in spring by planting out the smaller ones grown from cuttings.
A cutting will contain the same genetic material as the parent plant, so you should get exactly the same plant in terms of colouring and habit.
This is an advantage of cuttings rather than seeds you have collected.
Potential cross pollination means plants grown from seed may not come true to the exact same variety as the plant you collect them from. They may have another, unknown parent with slightly different characteristics.
This is an advantage of cuttings rather than seeds you have collected.
Potential cross pollination means plants grown from seed may not come true to the exact same variety as the plant you collect them from. They may have another, unknown parent with slightly different characteristics.
Which plants can I take cuttings from?
Different plants grow in different ways and suit different ways of taking cuttings. The basic method I'm covering in this post is stem cuttings. This is when you take a growing stem and get it to grow roots so it can survive as a plant in its own right.
This is suitable for plants with fairly soft stems that have not yet matured and got woody.
This is suitable for plants with fairly soft stems that have not yet matured and got woody.
I'm taking cuttings from pelargoniums and pineapple sage. You can also use this method for perennials like lavender, verbena, penstemon, salvia, argyranthemum, some dianthus and some osteospermum - in fact many plants that have soft or semi ripe growing stems of a similar nature to the ones you see in my photos here.
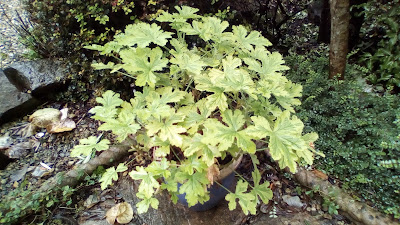
Here I have a scented leaf pelargonium which has grown nice and bushy over the summer. It needs to come indoors over winter, so I cut it right back, and use the pruned material for cuttings. The parent should grow up again next year. I'm doing the same with other varieties, and with pineapple sage. The second picture is another pelargonium reduced in size ready to over winter indoors - believe it or not it started out the same size as the other one!
Here I have a scented leaf pelargonium which has grown nice and bushy over the summer. It needs to come indoors over winter, so I cut it right back, and use the pruned material for cuttings. The parent should grow up again next year. I'm doing the same with other varieties, and with pineapple sage. The second picture is another pelargonium reduced in size ready to over winter indoors - believe it or not it started out the same size as the other one!
What do I need to take stem cuttings?
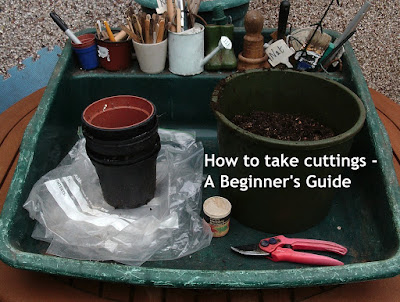
As you can see from the top picture, all you need is some small pots, some compost, a sharp knife or pair of secateurs, and perhaps some rooting powder and some clear plastic food bags, though these last two items are both optional.
The compost needs to be fine, gritty and free draining, as you don't want cuttings sitting in anything too soggy. You can buy special seed/cutting compost, or mix your own from your compost heap. I'm using my own compost with fine grit added. You could add perlite or vermiculite instead of grit.
The compost needs to be fine, gritty and free draining, as you don't want cuttings sitting in anything too soggy. You can buy special seed/cutting compost, or mix your own from your compost heap. I'm using my own compost with fine grit added. You could add perlite or vermiculite instead of grit.
How to take stem cuttings
Retain moisture
Taking cuttings is all about giving the stems you've cut off the best chance of growing their own roots so they can survive on their own. The first thing you need to be mindful of is making sure they don't dry out once you've cut them from the parent plant.
Putting them straight in a plastic bag as soon as you cut them is a good idea, and having everything ready so you can pot them up quickly will also increase their chances of survival.
Putting them straight in a plastic bag as soon as you cut them is a good idea, and having everything ready so you can pot them up quickly will also increase their chances of survival.
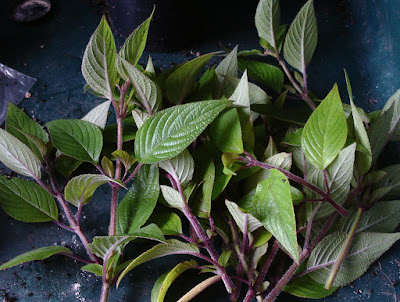 |
| Pineapple sage cuttings ready to go |
Remove any flowers or buds
You want any energy in the plant to go into producing roots as soon as possible so cut off or pinch out the tip of the stem and any buds or flowers.
 |
| Pinching out the tip to make sure it doesn't try and produce flowers |
Cut the stem
A good size for the cutting is up to about 10cm long so cut it to size by cutting off the bottom. Make the cut with a sharp knife or sharp pair of secateurs. A nice clean cut minimises the damage and makes it less likely to rot or get fungal diseases.
Make the cut immediately underneath a node (where leaves grow out from). This is the place on the stem where new cells are most likely to grow from.
Make the cut immediately underneath a node (where leaves grow out from). This is the place on the stem where new cells are most likely to grow from.
 |
| Cut the stem cleanly just below a leaf node |
Reduce the number of leaves
The plant needs leaves to photosynthesise. This is how it takes energy from sunlight to grow roots. But too many leaves will allow it to lose too much moisture, dry out and shrivel up, so remove most of them. Leaving just a couple at the top is enough.
 |
| Cut off most of the leaves cleanly with a sharp blade |
Put the cutting into compost
If you have rooting hormone powder or gel, dip the bottom of the cutting in it and then insert the cutting into your post of compost, against the side of the pot. You don't have to use hormone, it just gives an extra helping hand and may increase the percentage of your cuttings that work.
Push the cutting down far enough to be stable, and making sure the node where you cut is well below the surface. Put more cuttings around the outside of the pot, avoiding them touching each other.
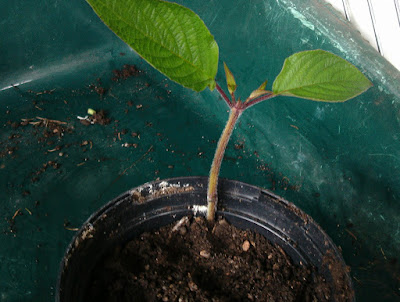 |
| Insert your cutting into the compost against the side of the pot |
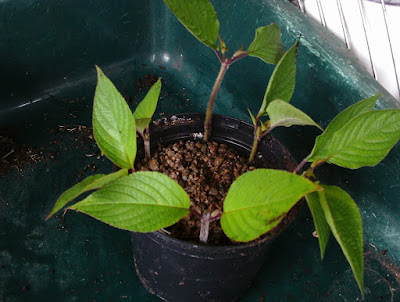 |
| A pot full of cuttings of pineapple sage |
Look after your cuttings
There are two main ways your cuttings will fail. They can dry out, or they can rot from being too wet. It's a balance, just keep an eye on them and after about 6-8 weeks they will have developed roots and can be potted up into their own pots. A plastic bag over the top can help retain the moisture so they don't dehydrate.
They need light but avoid a really sunny place as this is likely to be too hot and dry them out. A windowsill is good if it's not too sunny a position. Mine are in an east facing window, south would be too warm.
They need light but avoid a really sunny place as this is likely to be too hot and dry them out. A windowsill is good if it's not too sunny a position. Mine are in an east facing window, south would be too warm.
You need to give them a little bit of water occasionally but only just enough so that the compost stays moist, but not so that they get waterlogged and rot. As with any propagation method, don't worry if some don't make it, a 100% success rate is almost impossible.
Taking cuttings is simple so take loads and then even if only a few make it, you've got yourself some free plants!
So that's how easy it is to take cuttings. What are you going to take cuttings from? Taking cuttings is simple so take loads and then even if only a few make it, you've got yourself some free plants!
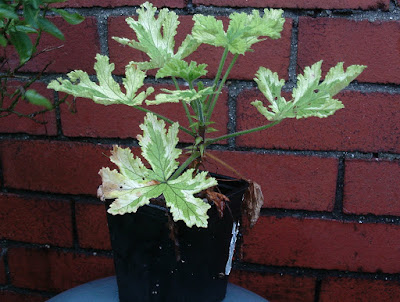 |
| Successful cutting potted up |
Make sure you come back soon for a beginner's guide to planting bulbs.

No comments:
Post a Comment
Note: only a member of this blog may post a comment.